Episode 4 - Removing the re-
maining seat leg stubs, the
swing out arm at the front,
and the swing-out stop sign
In the last episode we removed most of the seats by a quick-
and-dirty method: just cut off the legs a couple of inches above
the floor. It let us clear the bus of seats fast - great to have
some room to walk around. But it was only a stop-gap solution.
In this episode I remove the nuts and bolts holding down all
those leg stubs. (I’ve kept one bench seat at the right front for
now, so I can take family and friends for the odd ride.)
When other drivers see a skoolie, they should have no
confusion about whether it’s a functioning school bus. The
single biggest way to achieve that is to paint over the chrome
yellow paint (a requirement in Ontario.) But I have to wait till
spring to do that, as the paint won’t cure in the cold.
What I can do now is to remove the passenger/student safety
arm that swings out from the front of the bus, and the stop
sign that swings out from the side. I cover that process in this
episode, too.
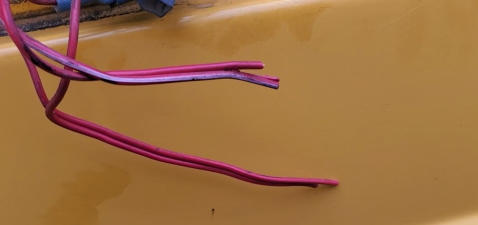
This is the first time I cut any wires on the bus. There are a
number of interlock systems on a school bus to keep the kids
safe. Cut the wrong wire and the bus won’t start. Now you’ve
got a seven ton doorstop that will cost you a fortune to tow to
a mechanic. My advice: after you cut a wire or two, before you
cut any more, try to start the bus. If it won’t start, you’ll know
which wires are the reason, and you can splice them back
together.
Click the image below to see the episode on my YouTube
channel. And while you’re there, click the Subscribe button so
you don’t miss subsequent episodes.

Copyright 2024 TheSkoolieLife.com